Lesson 10/10100%
MODULE 10 · CAPSTONE

Debugging Workflow, Simulator & Summary

A structured way to chase down an ESD failure, an interactive spark-gap simulator to build intuition for breakdown behavior, a full engineering checklist, and a capstone quiz spanning everything covered in this course.

Click through the decision tree below to see the recommended path from a reported ESD symptom to a confirmed fix.

Adjust the charged-object voltage and the approach gap to see when the air breaks down and a spark forms. This is a simplified illustrative model, not a precise Paschen-law calculator, but it captures the basic relationship: higher voltage breaks down a larger gap.

8.0 kV
3.0 mm

Design Phase

Identify every exposed conductive and non-conductive surface a user or object could contact or approach
Select TVS/protection components against both working voltage and clamp voltage (Module 08)
Confirm component CDM/HBM ratings are adequate for the manufacturing handling process, not just field use (Module 03, 09)
Identify the applicable product-family standard and required test levels early (Module 04, 06)

Layout Phase

Place protection components as close as possible to the entry point (Module 08)
Route short, low-inductance ground returns for every protection component
Keep sensitive traces away from seams, connector edges, and enclosure openings
Maintain a continuous ground plane under high-speed and exposed I/O traces
Verify chassis-to-PCB ground bonding is a deliberate, low-impedance, single-point (or explicitly justified) connection

Mechanical & Enclosure Phase

Bridge enclosure seams near user-accessible metal with conductive gaskets or spring fingers
Consider recessing or shielding highly-exposed contacts (charging pins, card slots)
Add ferrite/common-mode chokes on cables crossing the enclosure boundary where appropriate

Firmware Phase

Add debounce/duration filtering on capacitive touch or other sensitive digital inputs (Module 09)
Add CRC/retry logic on communication buses exposed to transient risk
Implement a watchdog as a safety net, not a primary mitigation (Module 09)

Test Phase

Pre-compliance test early and often, not just before formal certification
Test at every accessible point per IEC 61000-4-2/product-family standard, both contact and air discharge (Module 04, 05)
Test beyond the minimum required discharge count to catch cumulative/repetitive degradation (Module 09)
Record performance criteria (A/B/C/D) per test point, not just pass/fail

Manufacturing & Handling Phase

ESD-safe smock, cap, gloves, wrist strap and footwear laid out on a dissipative mat
Personal ESD control: dissipative smock, cap, gloves, wrist strap and footwear — the operator is the most common discharge source on a production line.
Metallized ESD shielding bags with the ESD susceptibility label
Metallized shielding bags form a Faraday cage around boards in transit — dissipative pink poly alone does not stop an external discharge.
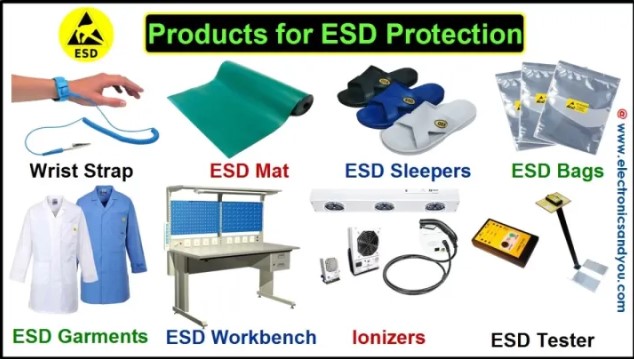
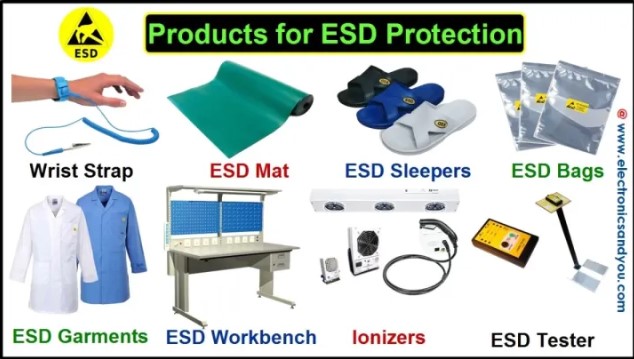
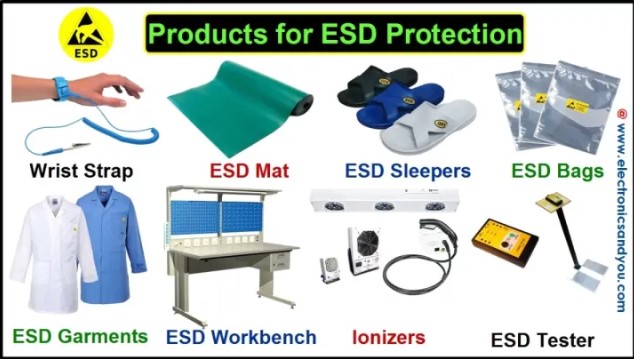
Overview of ESD protected area equipment: wrist straps, mats, footwear, bags, garments, workbench, ionizers and testers
The full EPA (ESD Protected Area) toolkit: straps, mats, footwear, garments, shielding bags, grounded benches, ionizers for insulators, and testers to verify it all actually works.

Over ten modules, this course traced ESD from first principles through to field-ready engineering practice: how charge builds through the triboelectric effect and why humidity matters (Modules 01-02); the three standardized discharge models and how IEC 61000-4-2 structures system-level testing (Modules 03-05); how requirements vary sharply across product categories (Module 06); the physical mechanisms behind both catastrophic and latent silicon damage (Module 07); concrete TVS selection and PCB layout practices (Module 08); twelve real-world-style failures spanning every major industry (Module 09); and finally a structured debugging approach and full engineering checklist (this module).

The consistent thread across every case study was the same: ESD immunity is rarely won or lost at the test lab. It is won or lost in component selection, ground return routing, and enclosure design decisions made months earlier. Treat the ESD gun as a verification tool for a design that was already built to survive it, not as the first line of defense.

CAPSTONE KNOWLEDGE CHECK

Course Capstone Quiz

Score: 0 / 15

This capstone quiz spans every module of the course. Select the best answer for each question.

Question 1 of 15